Preparing graphics for DTG and DTF
Preparing graphics for DTG and DTF:
While digital printing methods can handle photographic elements and gradients with ease, what most struggle with are semi-transparent pixels. Images are converted ready to print by a RIP (Raster Image Processor) and these look at, and convert the pixel information in a raster graphic or convert vector graphics, into raster images. A pixel with a 1% opacity is still a pixel with information and as such, some RIPs and print software will pick that information up as intentional. If it is on a coloured garment that requires a white base then these pixels, whether intentional or not can be printed in white before being printed in that 1% of whatever colour that pixel was.
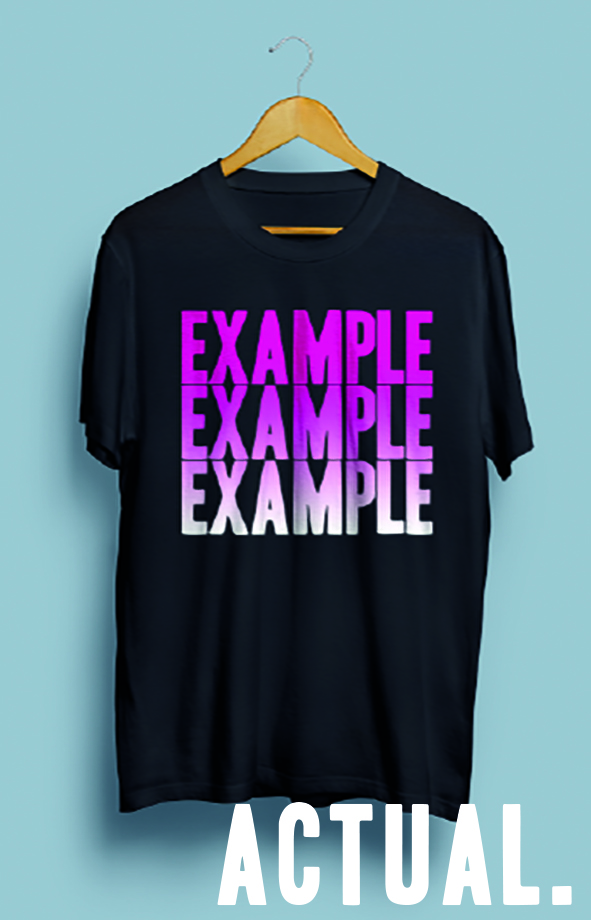

This can result in ‘random’ spots in your image and more commonly, a light/white glow around your image. Ideally your images should have hard edges with 100% opaque coloured pixels. This isn’t always possible so the best way to check is to use a tool like Photoshop’s magic wand, set to ‘discontiguous’ and a threshold of ‘1’. Click on a transparent area of your artwork, then invert that selection and on a new layer behind the artwork, fill with white. If you see a white glow/outline around your image this is likely (although to a lesser extent depending on the print settings) to show up on the final print.
On a white background -

On a coloured background -

Resulting DTG print -

Resulting DTF Print -

To reduce this select all the white areas, reduce the selection by however many pixels will get rid of the glow, inverting the selection again and then deleting (on the graphic layers) all of those unwanted pixels. Make sure you save the image in a format that keeps the background transparent (png or tiff).
For templates please go to https://www.getagripstudio.com/design-artwork-guide

Comments
Post a Comment